|
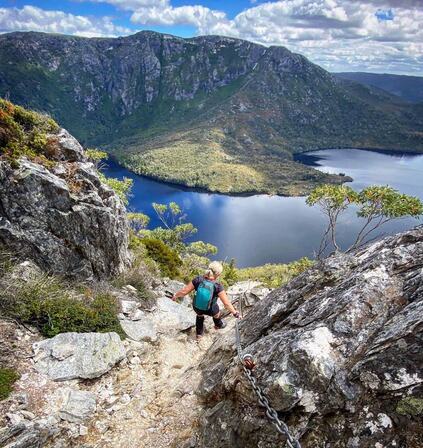
Steep descents can be one of the worst parts of hiking.
Uncontrollable jelly legs, painful knees and unsteady feet... Sometimes, they absolutely suck! But the good news is that there are A LOT of things you can do in your training, which can make steep downhills on the trail more tolerable. Do the front of your hips often get sore, tired or tight when hiking?
If so, this is for you! Squats can be a fantastic strength exercise for any hiker. They are simple, effective and very versatile. But one issue many hikers run into (especially those training at home) is they end up doing the same old squats over and over and over again. But as I always say, progression is the key to your training. Because the body gets used to things relatively quickly. And to ensure you are moving forwards (and improving your strength, endurance and resilience, which will help you on the trail), you want to be giving the body regular 'new' stimulus'. So it is getting regular challenge, and is forced to keep on adapting and improving. Now in the gym environment, progression is relatively easy. You can add a small amount of extra weight every week or two. But at home, this isn't often very practical (unless you have a great home gym set up!) So today, I want to share with you a simple squat progression a hiker can use at home. Which, if you follow, will ensure you are constantly challenging yourself and helping your body improve for the trail! Progression #1: Bodyweight Box Squat In this option, you stand in front of a chair, bench or couch. You perform a standard squat but stop when you feel your bum hit the surface below you (this limits the range of motion slightly and is a great learning tool). Progression #2: Bodyweight Squat This is a standard squat. If you are not sure how to do this, there are a million videos on youtube. Progression #3: 1 + 1/4 Bodyweight Squat This is how you do this version:
Progression #3: 1 + 3/4 Bodyweight Squat In this version, you do the same as above, but this time you come up 3/4 of the way in between each rep (instead of 1/4). Progression #4: Pack Squat (front loaded) In this version, you will do a normal squat. But you will hold a pack with a bit of weight in it at the front of your shoulders. Progression #5: Pack Squat (back loaded) In this version, you will put the pack on your back (and add a bit of extra weight) and perform a normal squat. == Complete each version for 3-4 weeks, and then move on to the next option. Simple, but very effective! So if you have been doing the same old squats for a while, and are not really feeling the benefits, give this a go. It might give you the change you need :) And if did you want some help getting fit, strong and resilient for your hiking adventure, you can check out the Online Summit Program here: www.summitstrength.com.au/online.html Yours in trekking. Rowan
In this episode, I explore some incredibly important advice for any hiker who is looking to get the most out of their strength training.
|
AuthorRowan is a personal trainer who specialises in training for hiking, trekkers and mountaineers for their bucket list adventures. Archives
July 2024
Categories
All
|
AboutSummit Strength is a personal training for hiking service created specifically to help hikers have the best chance of a safe, enjoyable and successful adventure.
|
Company |
Services |
|
|
© COPYRIGHT 2018. ALL RIGHTS RESERVED.
|
Website Design by My Personal Trainer Website
|


 RSS Feed
